Instagram Reel Size: How to Make Reels That Actually Perform in 2026
The 2026 guide to Instagram Reel size: script, film, edit, and publish Reels that hit 1080x1920, pass safe zones, and scale without a camera crew.
Article Highlights
- Correct Instagram Reel size: 1080x1920, 9:16
- Script first. Weak hooks tank distribution.
- Film natively vertical at 30fps or higher
- Keep text inside the center 1080x1420 safe zone
- Batch 7 scripts, publish daily without a camera
- Argil turns a script into a publish-ready Reel
Instagram Reel Size: How to Make Reels That Actually Perform in 2026
If you uploaded a Reel last week and it came out blurry or got cropped weirdly in the feed, the culprit is almost always a mismatch between your file and the correct Instagram reel size. The wrong specs force Instagram to re-encode, letterbox, or auto-crop the video before anyone sees it, and a clean export at the right dimensions is what gives the algorithm the signals it needs to push the Reel into more feeds.
This is a builder's guide to producing Reels that perform in 2026, covering scripting through publishing without a camera crew on the other end.
What Is the Correct Instagram Reel Size? (And Why It Matters)
Start with the spec. The correct Instagram reel size is 1080x1920 pixels at a 9:16 aspect ratio. Duration runs from 3 seconds up to 3 minutes when recording in-app, and up to 15 minutes when uploading from your camera roll, per Hootsuite's 2025 spec update. Frame rate sits between 23 and 60fps, and file size caps at 4GB, per Sprout Social.
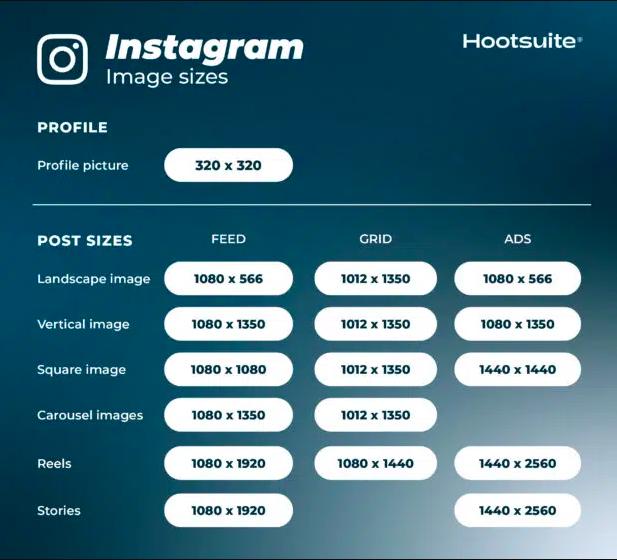
Nail your Reels specs first: 1080x1920, 9:16, up to 15 min uploads, 23–60fps, and max 4GB for smooth publishing. Image source: Hootsuite
Upload anything outside those specs and Instagram does the math for you. A 16:9 landscape clip ends up letterboxed with black bars or a blurred fill, a 1:1 square gets padded, and low-resolution footage compresses into something muddy on a modern phone. The end result is the same in every case: viewers scroll past in the first 2 seconds and the algorithm treats that early drop-off as a signal to bury the Reel.
Reels also display differently depending on where they surface. In the feed, Reels crop to 4:5. In the Reels tab and Explore, they display full-screen at 9:16. That means any important text or branding outside the center of your frame can disappear in one surface and survive in the other. Designing for both is a core part of getting the size right.
Step 1: Script Your Reel Before You Film Anything
Most creators treat scripting as optional. It is the highest-impact part of the entire process. The first 2 seconds decide whether someone watches or scrolls, and no amount of editing can rescue a weak opening.
The hooks that consistently work tend to be either a specific problem, a contrarian claim, or a surprising stat. "You're filming at the wrong size" lands harder than "Here's how to film a Reel" because the first promises a fix and the second only promises a tutorial, and viewers click on fixes far more often than tutorials.
The body depends on length. For a 30 to 60 second Reel, aim for 3 to 5 tight points with one idea per cut and no preamble. For a 60 to 90 second Reel, add a short payoff before the call to action so watch time holds. Anything longer than 60 seconds has to earn its runtime.
CTAs matter more than most creators treat them. A verbal CTA in the last 3 seconds plus an on-screen text overlay drives saves and shares, which Instagram weights heavily in distribution. Scripts that end with "save this for your next shoot" pull more saves than scripts that end with "follow for more."
How to Build a Repeatable Content Pillar System
A content system is a set of 3 to 5 pillars that map to your audience's problems. Pillars create viewer expectations. Expectations drive repeat views and follows, which are core ranking signals for the Reels algorithm.
A fitness creator might run 5 pillars across educational tips, myth-busting, behind-the-scenes training, product breakdowns, and short motivational clips, with one script template powering all of them. Once the template is locked in, you drop in the topic and keep the structure intact, which is why creators who batch 7 scripts on a Sunday outperform creators who improvise every Monday.
If you are building a personal brand on Reels, the pillar system matters even more. Argil's breakdown of how to brand an avatar that actually builds an audience in 2026 walks through how pillars connect to identity, which is what turns a viewer into a follower.
Step 2: Film in the Right Instagram Reel Dimensions from the Start
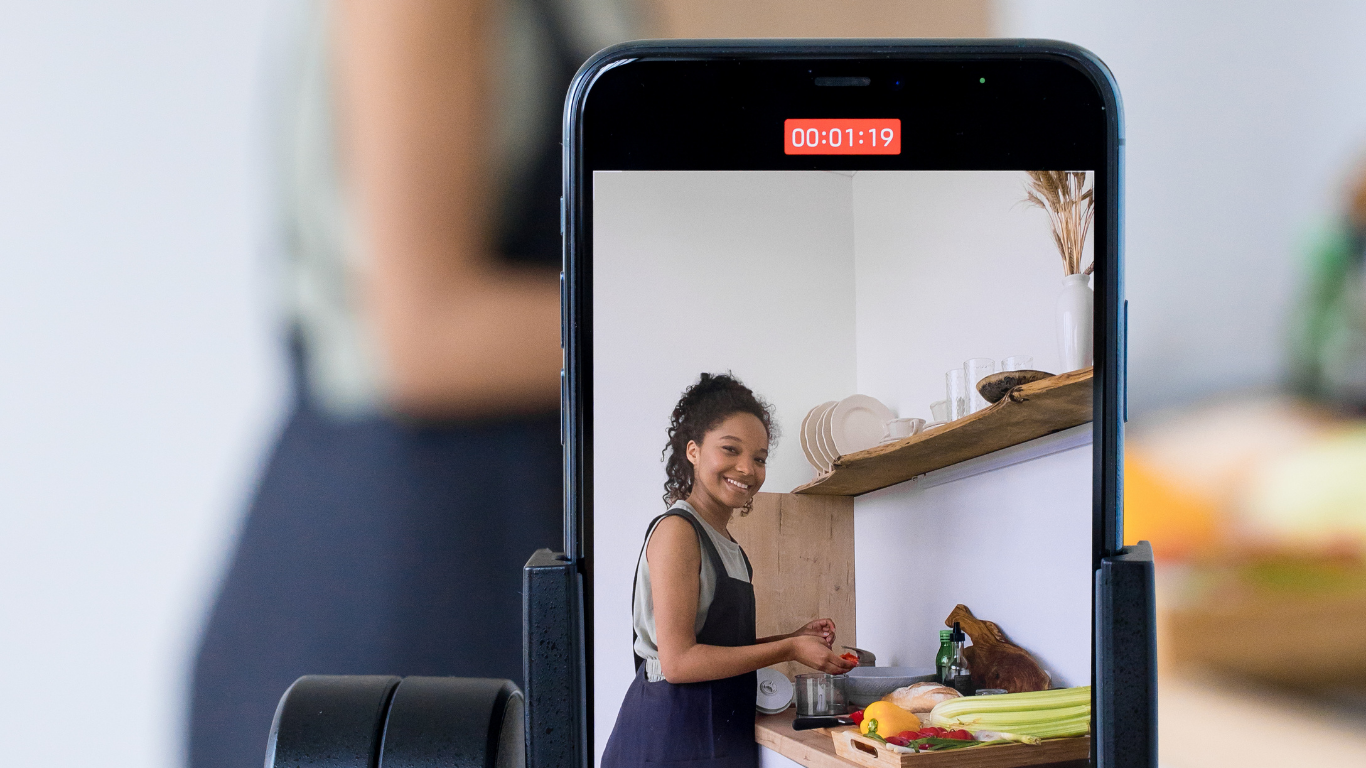
Always film natively in 9:16. Cropping a landscape clip down to vertical loses pixels and adds compression that limits your framing options later. Shoot portrait from the jump and you never have to fix anything in post.
Camera settings to lock in before you hit record: 1080x1920 resolution at minimum, 30fps for standard playback or 60fps if you want smooth motion, and stabilization on. Shooting at 4K and exporting to 1080p gives you room to crop and reframe in post, but only if you have the storage and a fast editor. For speed, shoot at 1080p directly.
Safe zone rules matter at the filming stage, not just editing. Keep faces and key visuals at least 250 pixels from the top edge and roughly 340 pixels from the bottom. The top strip is covered by the Instagram account handle and the audio bar, and the bottom strip is covered by the caption and the engagement icons.
Lighting is the cheapest fix that lifts every Reel. A window at eye level or a ring light sitting between you and the camera gives clean, even coverage. Flat or dim lighting reads as low effort, and viewers scroll past low-effort content before consciously deciding to.
No Camera Crew? Here Is What Still Works
A phone on a tripod plus a ring light outperforms most studio setups at this format. Raw delivery wins against polish on short-form vertical, and Reels are built for talking-head content that feels direct.
If you cannot or do not want to be on camera at all, you still have options. Screen recordings, slideshow-style Reels, and B-roll compilations work for educational and product content. Argil's guide to creating video content without being on camera walks through the formats that consistently pick up distribution. For fully faceless output, faceless Reels methods covers the 7 formats worth testing.
Step 3: Edit for Retention, Not Just Aesthetics
Instagram measures 3 things when deciding whether to push a Reel: average watch time, replays, and completion rate. Every edit decision should serve those numbers.
Start with pacing. Cut every 2 to 3 seconds to keep visual momentum up, and remove any dead pause longer than half a second. Jump cuts are expected on Reels, and creators who leave them in outperform creators who try to smooth them out, since each cut resets the viewer's attention.
Captions are non-optional. A huge share of viewers watch muted, especially on commutes and during work, and auto-captions keep them watching instead of scrolling. Place the caption text inside the center safe zone with high-contrast styling like white text on a black stroke, and keep the font size large enough to read on a grid thumbnail.
Audio strategy comes down to original versus trending. Original audio lets you build a branded sound, which compounds if your Reels start getting remixed. Trending audio gives you an early boost in distribution because the algorithm surfaces Reels using rising sounds. If you use trending audio, keep your own voice louder so the point lands.
Cover image is the single most ignored optimization. Instagram defaults to the first frame of your Reel, which is usually an accidental still. A custom 9:16 cover with a face close-up or bold text reads well in the Reels tab and doubles as a grid tile if you keep the 1:1 center sharp.
Editing Tools That Handle Instagram Reel Size Automatically
A fast editing tool removes one of the biggest friction points in posting consistently.
CapCut is free and handles 9:16 resizing and auto-captions out of the box, with a library of trending effects on top. Best pick for mobile-first editors who want speed.
Descript takes a different angle. You edit by cutting the transcript, and the video follows. It's the right tool for talking-head content where precision on words matters more than on visuals.
Argil is the most automated of the three. It outputs directly at 1080x1920 with captions placed in the safe zone, B-roll cut to the right beats, and transitions already applied. Argil starts at $39/mo, which sits cleanly between free editors and the custom pricing of production tools aimed at agencies. We cover the full setup flow in a later section.
Step 4: How to Produce Instagram Reels at Scale Using AI (Without a Film Crew)
The production bottleneck is filming, not the idea, and the time gets eaten by setup, lighting, multiple takes, outfit changes, and editing sessions. Even a single Reel takes 1 to 2 hours end to end once you account for every step, which is why most creators hit a ceiling at 3 to 5 Reels a week and daily posting requires a different workflow entirely.
This is where the AI video clone model comes in. Record a single 2-minute talking-head video of yourself, upload it to Argil, and Argil trains an AI clone on your face, voice, and expressions. From that point on, every new Reel starts with a script rather than a filming session: paste the script and pick a style, and Argil generates a fully-produced Reel in your voice, already formatted to 1080x1920 at 9:16.
Argil handles vertical framing, caption placement inside the safe zone, cut timing, B-roll overlays, background music, and transitions automatically, so nothing needs adjustment before you hit upload. Argil's clone workflow breakdown shows what the clone produces in practice.
A concrete pattern: a founder or coach who used to post 3 Reels a week suddenly posts daily. What previously took 8 to 10 hours a week in filming and editing drops to 30 to 45 minutes of scripting. The content quality holds because the quality was always in the script, not the camera.
This setup works best for a specific profile: coaches and founders, consultants and educators with subject-matter expertise but limited production resources. If your value sits in what you say, the filming step is pure overhead, and removing it lets you post at the frequency the algorithm rewards. The broader shift toward this workflow shows up in what's new in AI video generation in 2026.
How to Build a Reel Production System with Argil
The workflow has 4 steps, and the whole cycle takes under 15 minutes per Reel once you are set up.
- Batch-write 7 scripts in one sitting. Use your pillar system so you are not reinventing ideas every time.
- Paste each script into Argil. Pick the style and avatar.
- Review the generated Reel. Adjust the hook frame or swap a piece of B-roll if needed.
- Export and schedule via Instagram.
Batching scripts is the highest-impact part of the whole system. Everything downstream is automated, so the only real variable is script quality. All your creative energy goes into the hook and the script, not into production logistics.
Step 5: Optimize and Publish for the Algorithm
Publishing settings can lift or sink a Reel independent of the content quality. A strong Reel with a weak caption or default cover image loses to a mediocre Reel with the publishing details dialed in.
Caption strategy: your first line has to hook without the "more" cut-off, so keep it under 125 characters. Include a question or a clear CTA to drive comments. Instagram weights comments as a distribution signal, and comments on a Reel's first hour carry the most weight.
Hashtag strategy: use 3 to 5 niche hashtags rather than broad ones. Broad hashtags bury you in volume. Niche hashtags surface you to a smaller, more relevant initial audience, which lifts your early engagement rate and improves downstream distribution.
Posting time: check your own account's active hours in Instagram Insights. General benchmarks fall in the 6 to 9am window and the 7 to 9pm window in your audience's primary timezone. Consistency matters more than the exact hour. Gaps over 5 days can reduce distribution on your next post.
Cross-posting multiplies your return on one script. A Reel built in the correct 9:16 format drops cleanly onto TikTok and YouTube Shorts with minor edits. Remove any TikTok watermark before posting to Instagram, and adjust caption length for each platform. The guide to going viral on TikTok in 2026 covers the platform-specific tweaks that actually matter.
Common Mistakes That Hurt Instagram Reel Performance
5 mistakes show up over and over in low-performing Reels, and almost every weak post traces back to one of them.
Uploading in the wrong aspect ratio. Landscape 16:9 or square 1:1 Reels get letterboxed or cropped. Instagram deprioritizes these in the Reels feed. Export 9:16 every time.
Placing text outside the safe zone. Captions and graphics that spill into the bottom 340 pixels get covered by the UI bar. Check your text placement in the Reels preview before publishing, not after.
Low-resolution uploads. Compressing your video before uploading or exporting at a low bitrate creates muddy playback. Export at 1080p minimum with H.264 codec at a bitrate above 3.5 Mbps.
Skipping the cover image. A default mid-Reel freeze frame looks accidental in your grid. Set a dedicated cover, design it on a 9:16 canvas, and keep the center 1080x1080 clean so it works as a grid tile.
Posting TikTok watermarked videos to Instagram. Instagram explicitly suppresses watermarked cross-posts in Reels distribution. Remove watermarks with a dedicated tool or export the original file before reposting.
FAQ
What is the ideal Instagram Reel size in pixels?
1080x1920 pixels at 9:16. That is the native full-screen size. Anything narrower or shorter will be padded or cropped. Keep file size under 4GB and length between 3 seconds and 3 minutes when recording in-app.
What happens if I upload a video with the wrong aspect ratio?
Instagram letterboxes it with black bars or a blurred background fill, or it auto-crops the frame to fit the Reels player. Both outcomes cut off content and lower visual quality. The algorithm also gives lower distribution to non-native formats because the early drop-off rate is higher.
What is the best length for an Instagram Reel?
15 to 30 seconds for maximum completion rate. 30 to 60 seconds for educational content where depth adds value. 60 seconds to 3 minutes only if the content genuinely needs the runtime. Completion rate is a core ranking signal, and shorter is almost always safer.
Can I repost a TikTok video as an Instagram Reel?
Yes, but export the original file without the TikTok watermark. Instagram's algorithm suppresses watermarked content in Reels distribution. Use a watermark remover or export directly from your editing app.
Do Instagram Reels need captions to perform well?
Yes. A significant share of viewers watch muted. Auto-captions keep them watching instead of scrolling. Captions also reinforce key points visually, which lifts saves and shares.
How do I produce more Instagram Reels without spending more time filming?
Use an AI video clone tool. Record yourself once to create the clone, then generate Reels from scripts alone, with each output already at the correct Instagram size with editing, captions, and pacing handled. It removes the filming and editing bottleneck so you can post daily from batched scripts, and Argil's 5-day trial is enough runway to test whether the output meets your quality bar.
Related Articles
- The best clipping software for content creators in 2026
- How to lip sync a video with AI in 2026
- Side hustles for college students using AI video in 2026
Instagram reel size workflow for creators publishing daily in 2026.